Git and Github for DevOps

DevOps Enthusiast | Exploring Cloud & Automation I’m an aspiring DevOps professional passionate about cloud computing, automation, and CI/CD pipelines. I’m currently gaining hands-on experience with tools like AWS, Docker, Kubernetes, Jenkins and GitLab CI/CD, Terraform, Ansible, and more. My focus is on improving development and deployment processes through continuous learning and practical application.
Alongside my learning journey, I share my insights and experiences through blogs to help others who are exploring the same path. I believe in learning together and growing by sharing knowledge, and I’m excited to connect with like-minded individuals in the field.
Let’s collaborate, share ideas, and grow together!
Let’s learn the basics of Git and GitHub, two important tools for DevOps. We’ll cover what they are, how they work, and go through some easy steps to get started. By the end, you’ll know how to set up Git, create a GitHub repository, and connect them. Let's get started
What is Git?
Git is a version control system (VCS) that helps you keep track of changes in your files. Think of it as a save button for your projects. If you ever make a mistake, Git allows you to go back to an earlier version of your work. This is especially useful when you're working with a team, as it ensures that everyone can collaborate without overwriting each other’s changes. Git keeps a complete history of all the changes, showing you who changed what and when. By using Git, you can manage your code more easily and reduce the chances of making mistakes
Understanding Normal File Systems and Version Control Systems
What is a Version Control System (VCS)?
A version control system (VCS) is a tool that helps you manage changes to files over time. It keeps track of every modification made to your files, allowing you to save different versions, collaborate with others, and easily revert to previous versions if needed. This makes it especially useful for projects that involve multiple people or frequent updates.
Normal File System
In a normal file system, you store your files on your computer or device. When you make changes to a file, it replaces the old version with the new one. For example, if you have a document and you save it after editing, the original version is lost. You can’t easily go back to how it looked before unless you manually save a copy of each version.
This method can lead to confusion, especially if you are working on a project with many files. You might forget which version is the latest or lose important changes.
Version Control System (VCS)
A version control system, like Git, changes this process. Instead of just saving one version of your files, it keeps track of every change you make. When you save changes, it creates a new version while still keeping the old ones. This way, you can go back and view or restore previous versions of your files whenever you need to.
With a VCS, you can:
Track Changes: See what changes were made, when, and by whom.
Collaborate: Work with others without worrying about losing someone else’s changes.
Experiment: Try out new ideas safely by creating branches without affecting the main project.
Using a version control system makes managing your files and collaborating with others much easier and more organized. Now that we understand these concepts, let’s explore how Git fits into this picture
Why We Need to Learn Git and How to Check If It’s Installed
Learning Git is important because it helps us manage our projects better. Git allows us to keep track of changes, collaborate with others easily, and go back to earlier versions of our work if we make mistakes. In today’s world, where teamwork is essential, knowing Git can make us more productive and help us avoid errors.
To check if Git is installed on your computer, open your terminal or command prompt and type
git —version
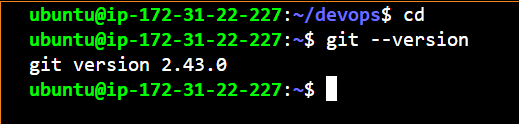
Git is installed, you’ll see a version number. If you see an error message, it means Git isn’t installed. You can easily download it from the Official website to start using Git for your projects
Key Features of Git
Now that we understand the importance of version control systems and how they differ from normal file systems, let’s explore some essential features of Git. These features help us manage our projects more effectively:
Repositories:
A repository (or "repo" for short) is where all your project files are stored. It tracks every change made to the files, allowing you to keep a complete history of your project. Think of it as a special folder that holds everything about your project.Branches:
A branch is a separate line of development in your project. It lets you work on new features or fix bugs without altering the main code. By creating a branch, you can experiment freely. Once you’re satisfied with your changes, you can merge them back into the main branch.Staging Area:
Before committing changes, you can place them in a staging area. This lets you prepare and review what changes will be included in the next commit. It’s a way to organize your commits and ensure you’re only saving the changes you want.Commits:
Each time you make changes to your files and save them in Git, you create a commit. A commit acts like a snapshot of your project at that moment. This allows you to revisit earlier versions if needed, making it easy to track progress or undo mistakes.Collaboration:
Git is designed for collaboration. Multiple people can work on the same project simultaneously without conflicts. Team members can create their own branches, make changes, and then merge their work into the main branch efficiently, keeping the project organized and up-to-date.Merging:
Merging is the process of combining changes from one branch into another. When you finish working on a feature in a branch, you can merge it into the main branch. This helps bring your new work into the stable code.Remote Repositories:
A remote repository is a version of your project stored on a server, like GitHub. It allows you to share your work with others, collaborate in real time, and back up your projects online.
These features come together to help you manage your projects more effectively. They enable you to track changes, collaborate with team members, and maintain organization throughout your development process. Now, let’s dive deeper into what a branch is and how it works in Git
Creating Your First Git Repository
Now that we've covered the key features of Git, let’s create your first repository. This is an important step in using Git effectively for your projects. Follow these simple steps to get started:
Open Your Terminal or Command Prompt:
Depending on your operating system, open the terminal (Linux/Mac) or command prompt (Windows). This is where you’ll enter the commands to create your repository.Navigate to Your Project Folder:
Use the cd command to change directories to where you want to create your repository. For example, if you want to create a folder named "git-repo" on your desktop, you would typeInitialize a New Git Repository:
To create a new Git repository, type the following command and press Entergit init
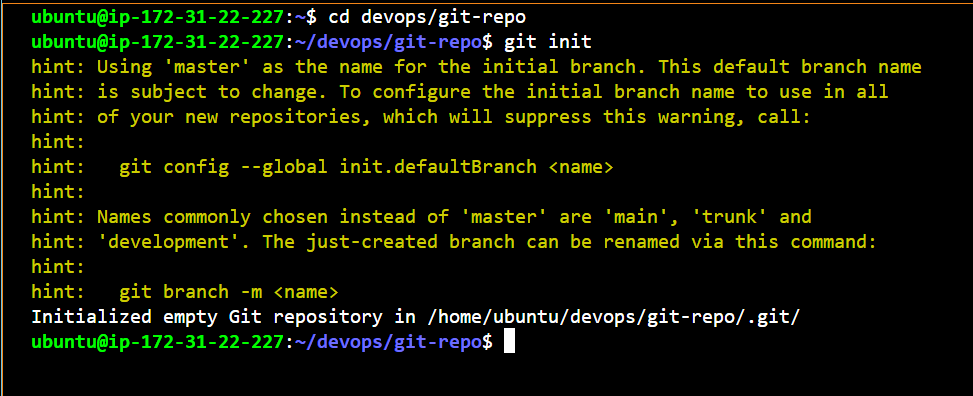
This command will create a new .git folder, where Git stores all its version history and configuration.
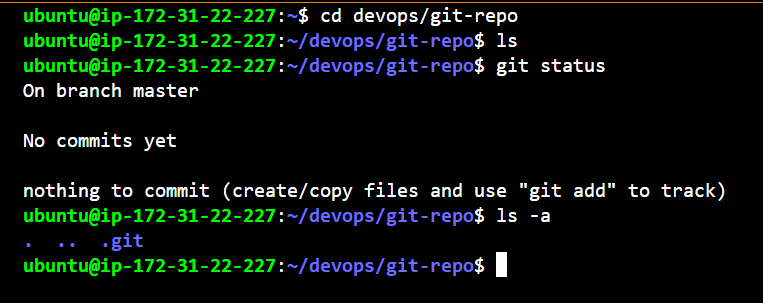
Congratulations! You have successfully created your first Git repository named "git-repo." You can continue adding files, making changes, and committing them as you develop your project
Understanding Git Commands
Now that you’ve created your repository, let’s review some basic Git commands that will help you manage your projects effectively:
git init :
Initializes a new Git repository in your current directory, setting up all necessary files for tracking changes.
git add :
Stages changes for the next commit. You can use git add . to stage all changes in the current directory.git commit :
Saves your staged changes in the repository. Use -m to add a message describing what you changed.git status:
Displays the current status of your repository, showing which files are staged, modified, or untracked.git log :
Lists all commits in your repository, allowing you to see the history of changes.
Adding Files to Your Repository
Now that you have your "git-repo" repository set up, let’s add a file, stage it, and then commit the changes. Here’s how to do that:
Create a New File:
You can create a new file in your repository. For example, let’s create a file named devs.txt You can do this using a text editor of your choice. If you're using the command line, you can quickly create a file by typing:
Command use :- echo”message” > filename
Check the Status:
Before staging your file, it’s a good idea to check the status of your repository Type
Command :- git status
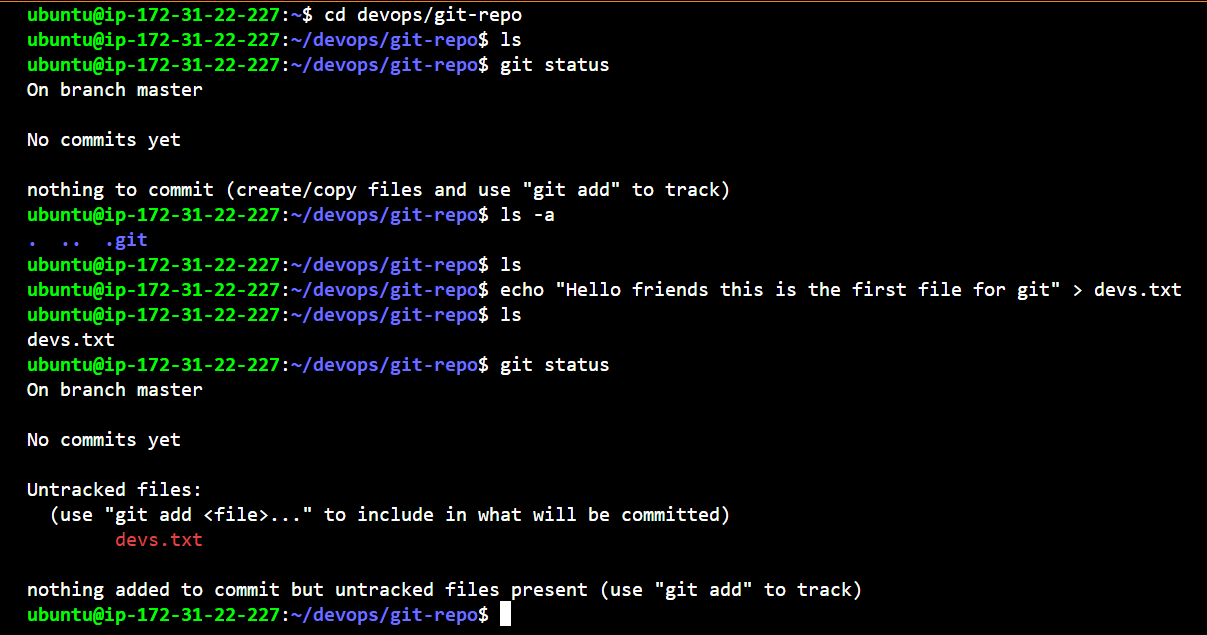
This will show you that devs.txt is an untracked file
Stage the File:
To stage the newly created file for your next commit, use
Command :- git add devs.txt
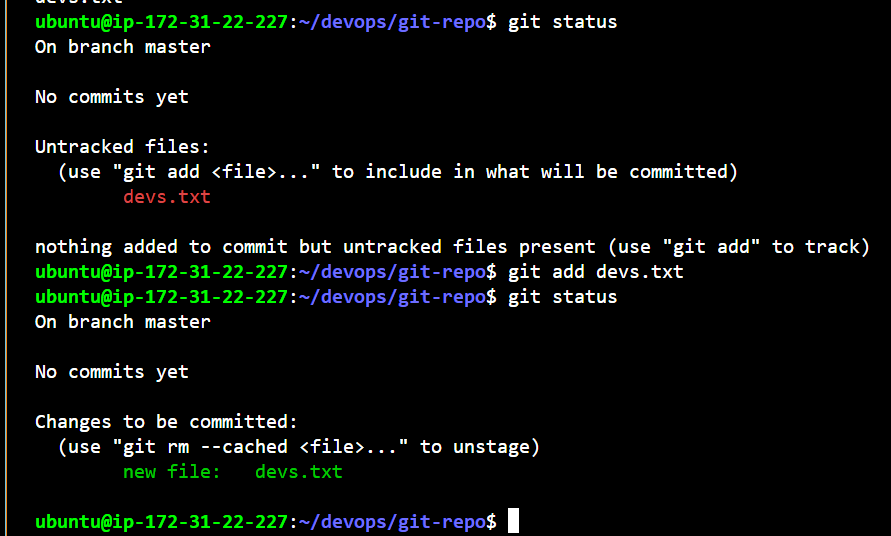
Commit the Changes:
After staging the file, it’s time to commit your changes. Use the following command
Command:- git commit -m “commit message”
This command saves the changes to your repository, and the message describes what you’ve added.
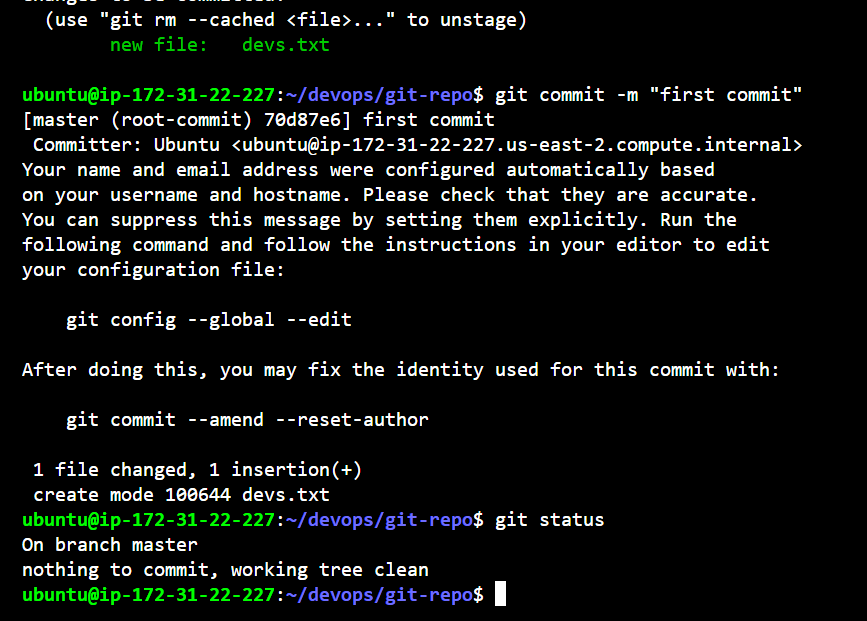
Verify Your Commit:
To ensure that your file was added and committed successfully, you can check the status again
Command:- git status
You should see a message indicating that your working directory is clean, meaning all changes have been committed
Now you have successfully added a file named devs.txt to your "git-repo" repository, staged it, and committed your changes. You can continue to create more files, make changes, and commit them as you develop your project
What is GitHub?
GitHub is a web-based platform that uses Git for version control. It allows you to store and manage your code in repositories. With GitHub, you can easily collaborate with others, track changes in your projects, and share your work.
Why is GitHub Important?
Collaboration: GitHub makes it easy for multiple people to work on the same project. You can see who made changes and when, making teamwork smoother.
Hosting: It provides a place to host your code online, making it accessible from anywhere.
Community: You can connect with other developers, contribute to open-source projects, and share your work with the world.
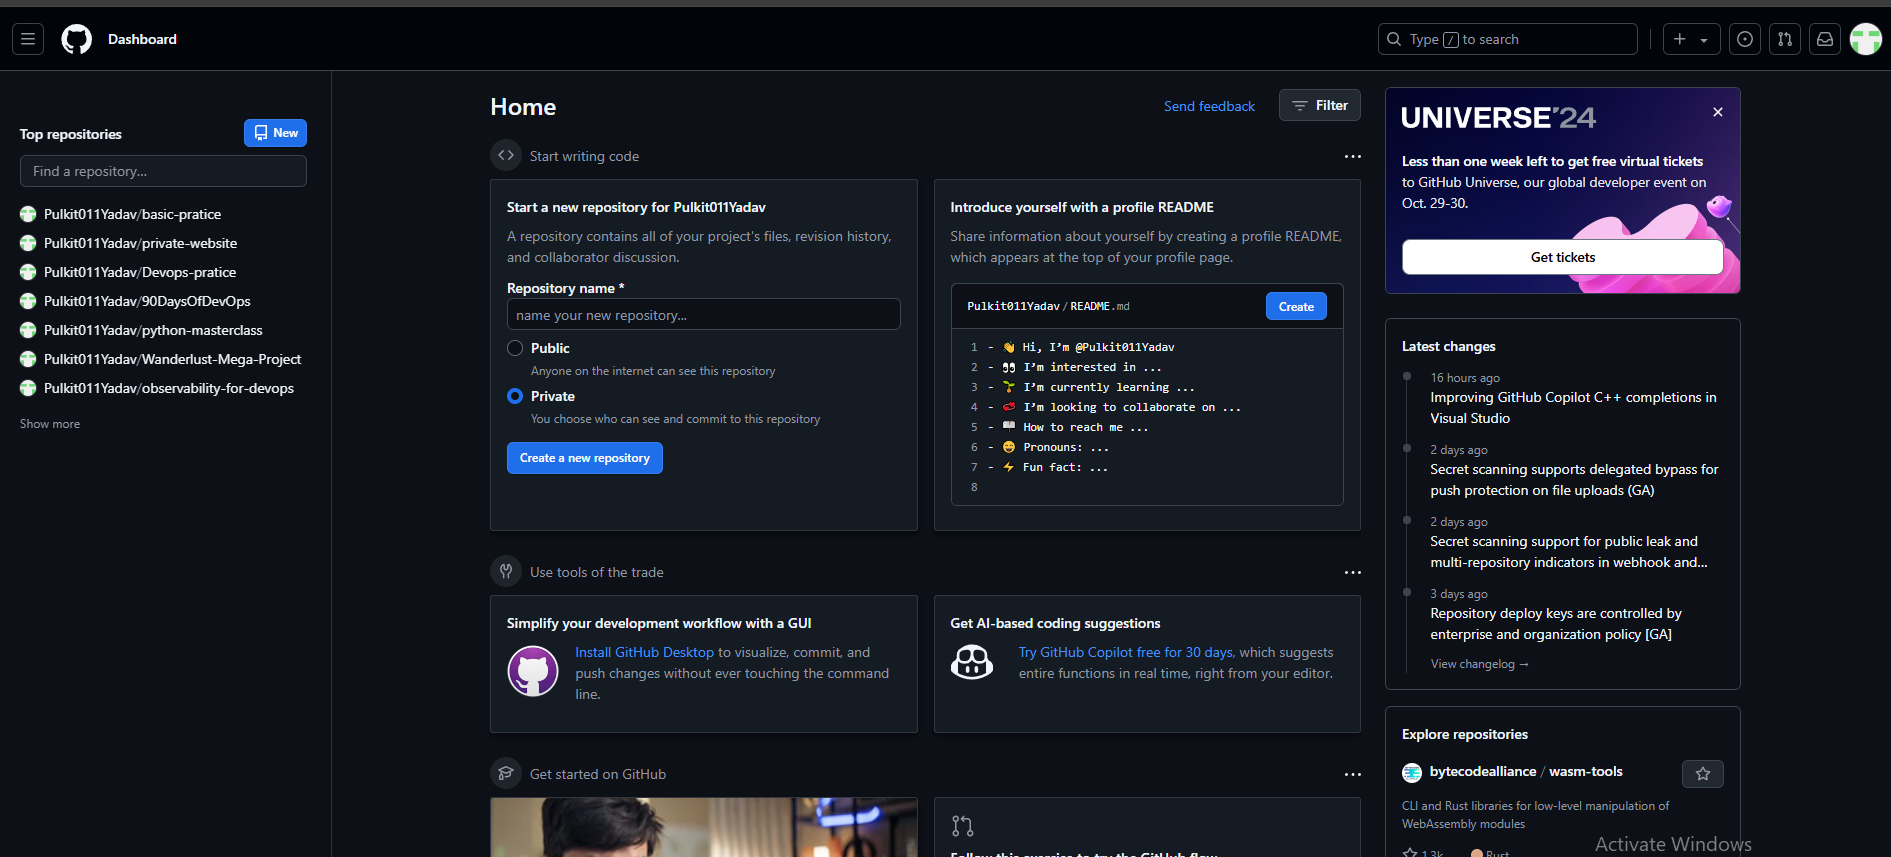
Key Features of GitHub
Repositories: Where your projects live. You can create, share, and manage them.
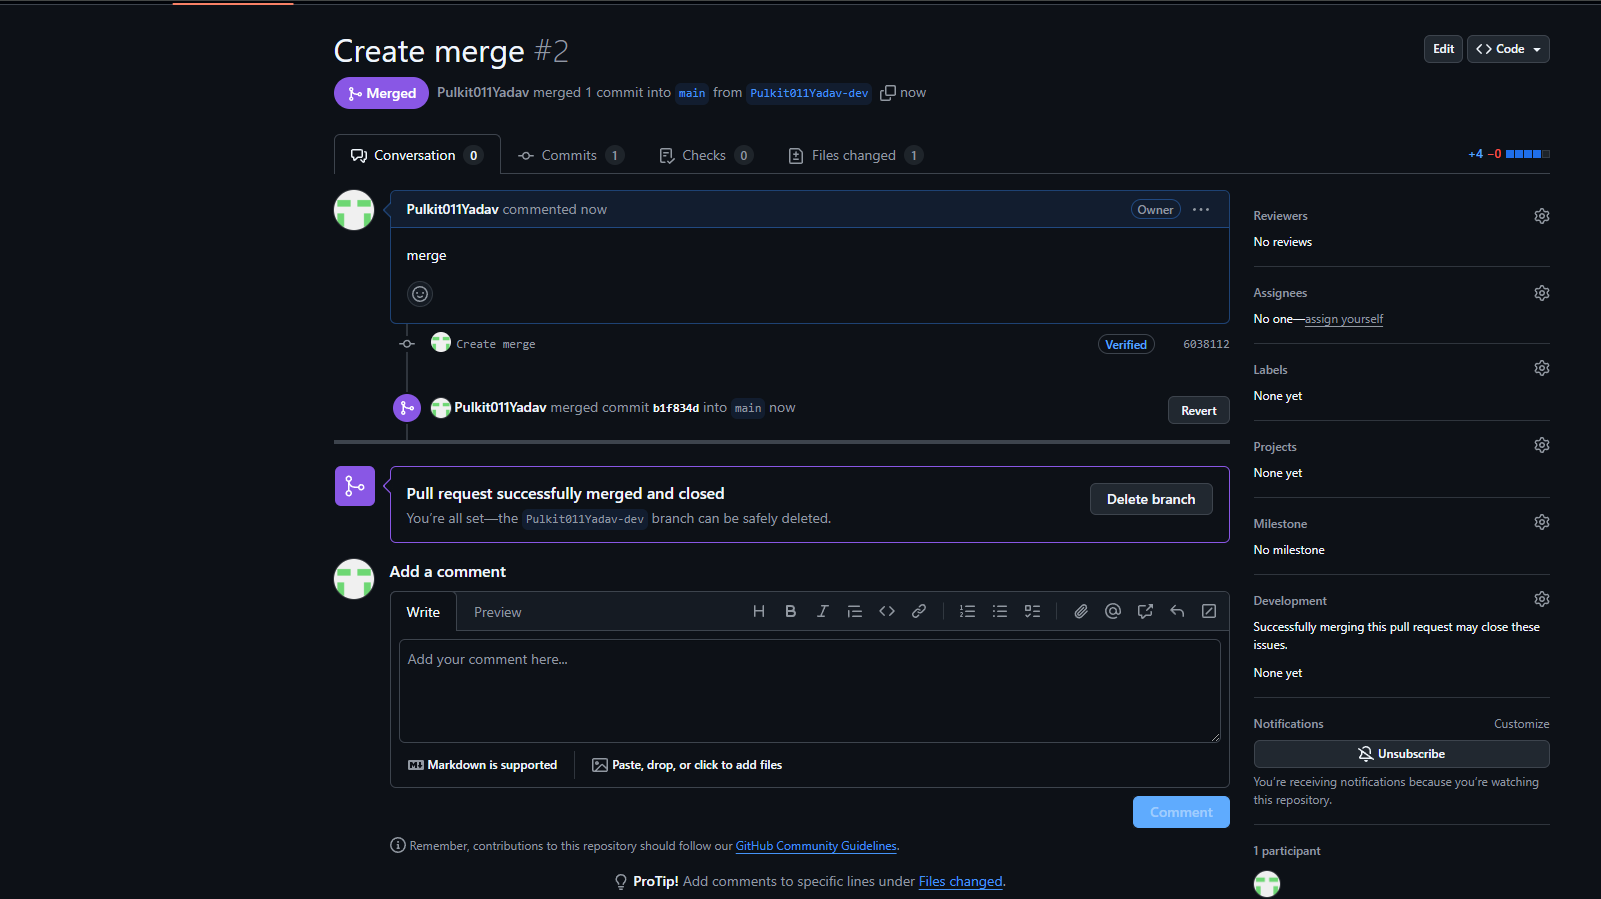
Pull Requests: A way to propose changes to a project. Others can review your changes before they are merged.
Issues: A place to track bugs, tasks, and feature requests.
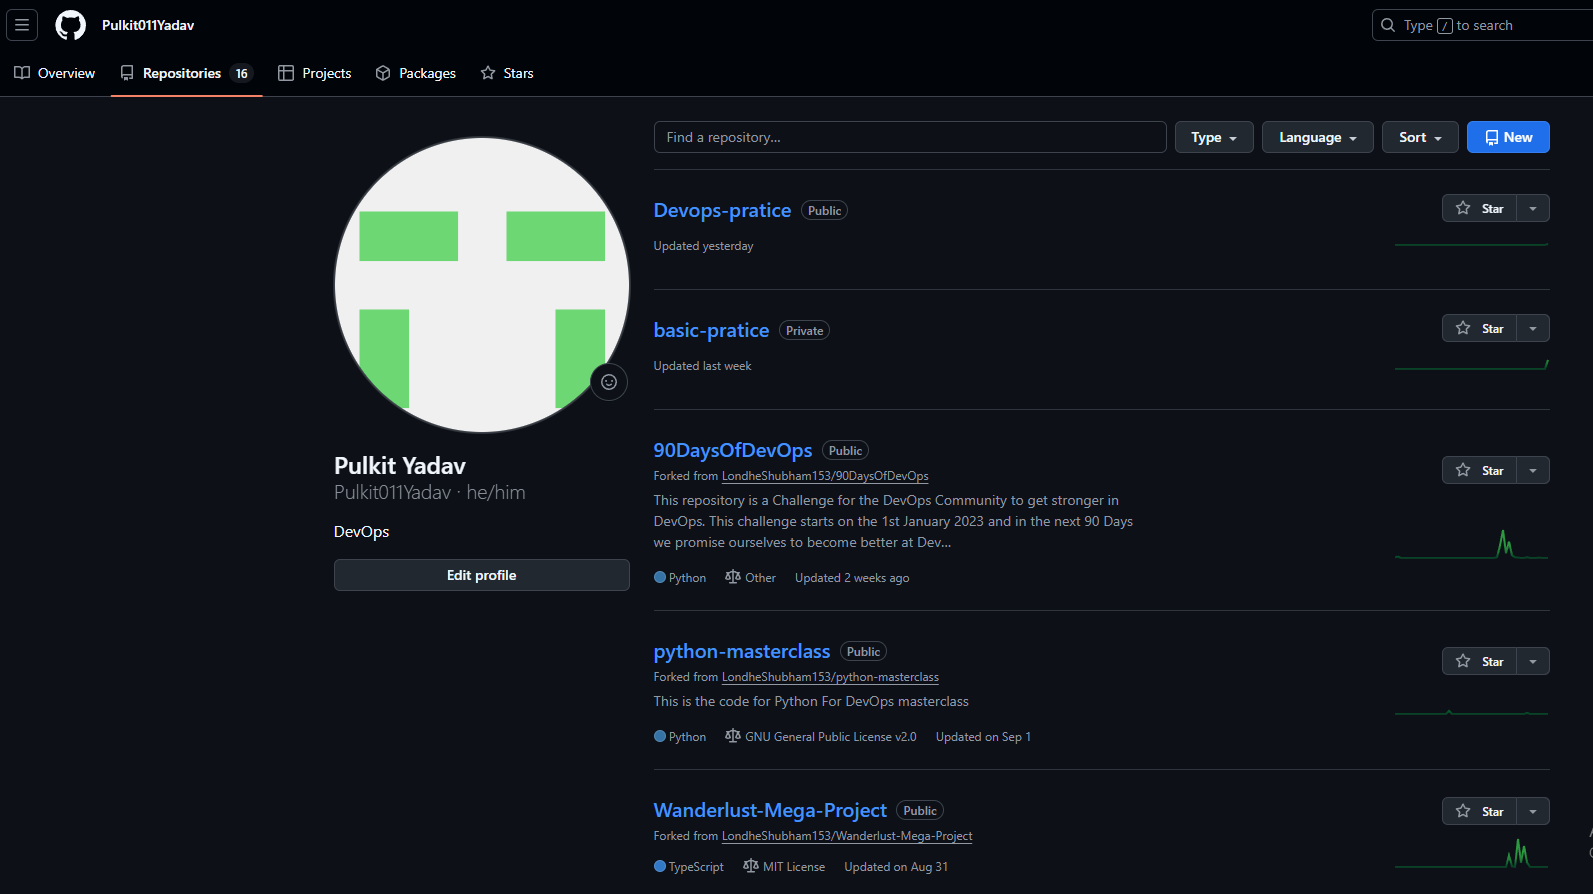
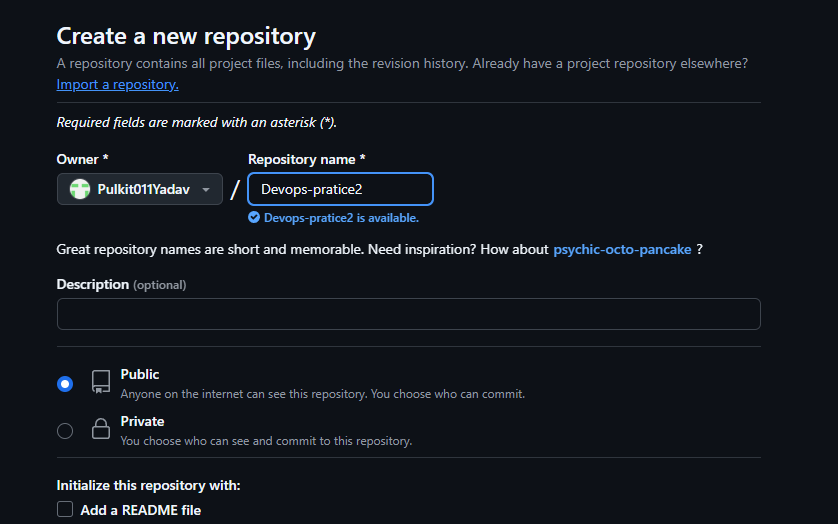
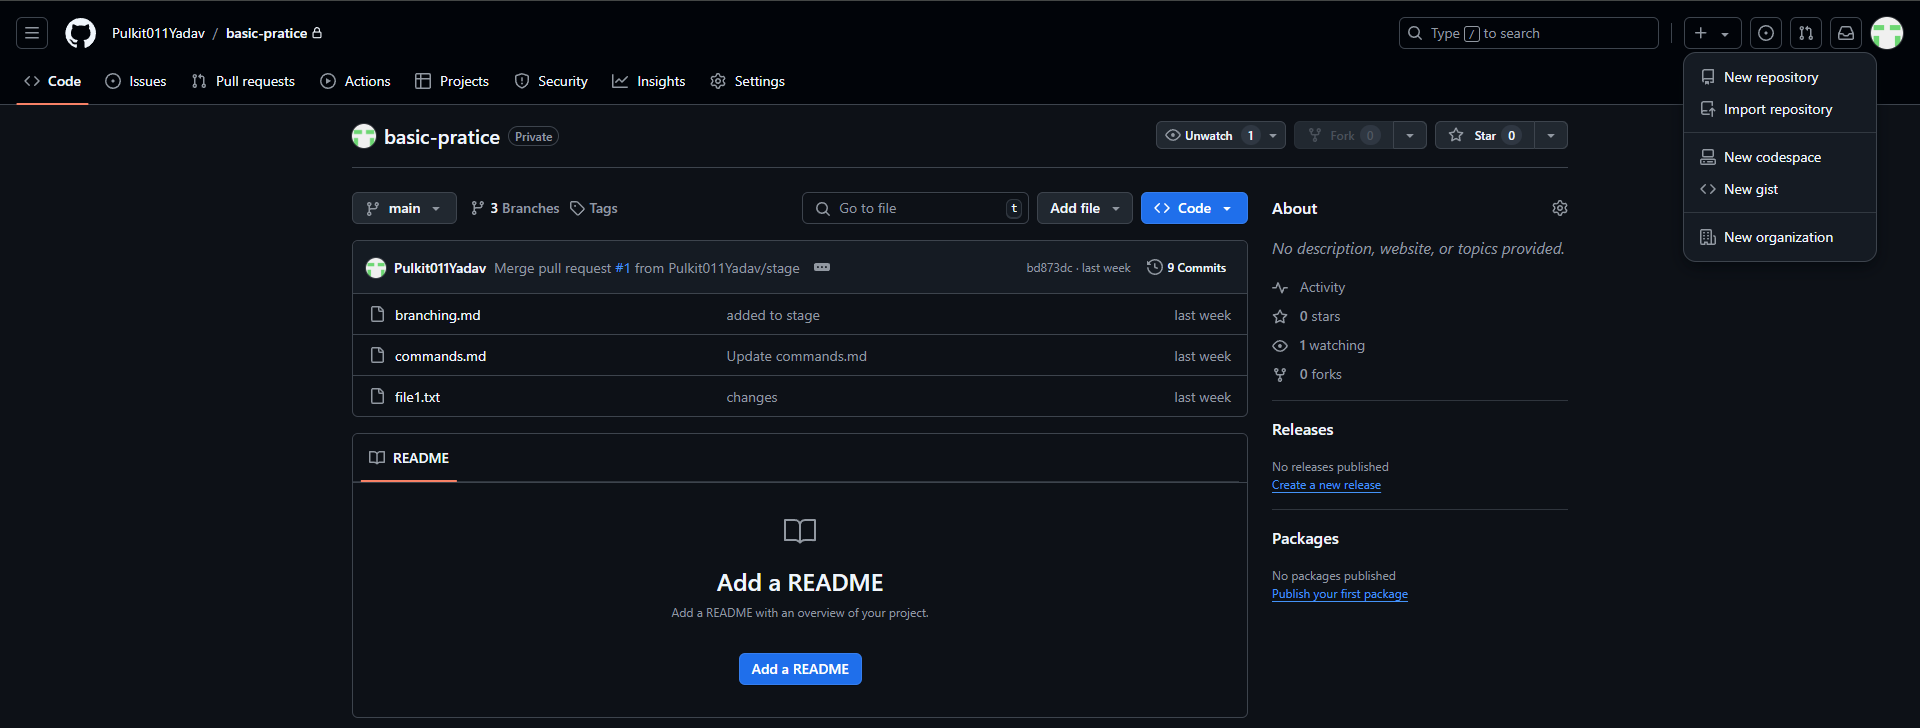
How to Create a Repository on GitHub
Sign in to your GitHub account.
Click the "+" icon in the top right corner and select "New repository."
Name your repository and add a description.
Choose whether to make it public or private.
Click "Create repository."
Conclusion: Git and GitHub for DevOps
As we finish our look at Git and GitHub, it’s important to see how valuable they are for DevOps engineers and developers.
Git helps you:
Track Changes: Keep an eye on all revisions to your code and easily go back to earlier versions.
Create Branches: Work on new features or fix bugs without touching the main code, keeping everything organized.
Facilitate Collaboration: Enable teamwork, so multiple developers can work on different parts of a project at the same time.
GitHub makes your development even better by offering:
Cloud Storage: Store your code online, making it accessible from anywhere and safe from loss.
Pull Requests: Provide a space to review and discuss code changes, ensuring quality before merging into the main project.
Project Management Tools: Help you track issues and manage project progress easily, improving team collaboration.
GitHub Actions: Automate workflows for your projects, such as running tests or sending notifications when code is updated, saving time and effort.
Together, these tools make your workflow smoother and empower you to work effectively alone or with a team.
In our next blog, we'll dive into how to connect your local repository to a remote one on GitHub, so stay tuned for that! Thank you for your continued support, and happy learning! 🌟